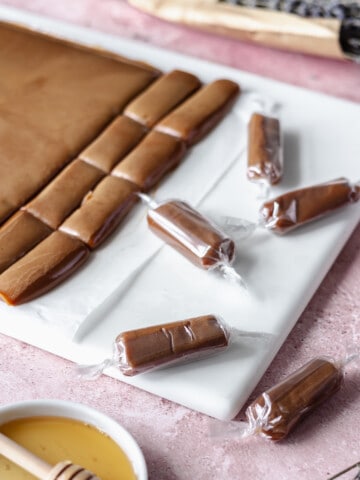
Chocolate on chocolate. These double chocolate caramel marshmallows have a fluffy chocolate marshmallow layered over smooth chocolate caramel, it will satisfy any chocolate craving you have.
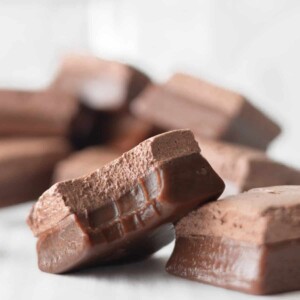
Chocolate caramel marshmallows - a lesson in patience.
You will need to stir from start to finish with this caramel. This is around 40 minutes. You do not stop stirring. Have a show ready to watch, have a podcast ready to listen to, don't have kids around that can distract you. Yes, it does take that long and KEEP GOING. If you see a lot of steam, you aren't done. Trust the process, trust your candy thermometer.
If you are new to candy making, please read this post and the recipe prior to starting to make them. I'm happy to answer any questions, and here are the most asked about these:
Caramel marshmallow top 5 FAQ
- Does the marshmallow fall off of the caramel?
- Nope! The marshmallow really does stick to the caramel. When you layer the the marshmallow on top of the caramel, you are doing it when the caramel is cold and the marshmallow is hot. The hot marshmallow melts the top of the caramel just enough that it forms a bond. Once everything is cooled, they are going to stick.
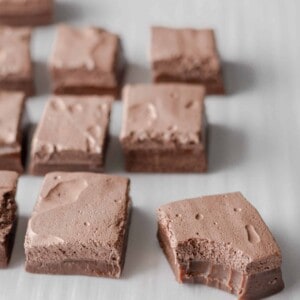
- Isn't the marshmallow too sticky to cut through?
- No, the marshmallow isn't difficult to cut through with a knife. What would make a marshmallow sticky is if it wasn't cooked to a high enough temperature, because there would be too much water left in the marshmallow. Water + sugar = sticky.
- Do you sell these?
- This is the exact recipe I use for my own retail sales, but you can only purchase them if you are local to the area I live in. No shipping available.
- I don't want to wait. What happens if I don't let the caramel cool and top it with hot marshmallow?
- Everything will melt together too much and you'll end up with a slightly soggy weird candy that took a lot of effort but didn't give you the results you were hoping for.
- Do I really need to use a candy thermometer?
- Yes, you must use a candy thermometer. I'm giving very specific final cook temperatures. When you are at the end of cooking the caramel or marshmallow, degrees will change within SECONDS. You need to watch a thermometer, not a clock.
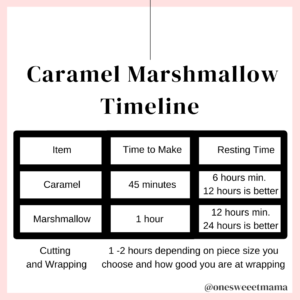
How much time do you need to make these?
Chocolate caramel marshmallows take me three days.
Candy is a labor of love. Two cooked sugar items (caramel and marshmallow) are going to take up a small chunk of time over a couple days. I personally make candy in the evenings after my kids go to sleep. These would take me one day per layer and one day to cut.
Caramel layer: (Day 1)
- 10 minutes to assemble ingredients
- approximately 40 minutes of cook time
- 6 hour minimum of resting time before you can layer hot marshmallow over top
Marshmallow layer: (Day 2)
- 15 minutes to assemble ingredients and prep gelatin
- approximately 30 minutes of cook time
- 8 minutes of whipping time in the mixer
- 12 hour minimum of resting time before you can cut and wrap
Cutting and wrapping: (Day 3)
- cutting and wrapping this batch will take 1-2 hours depending on how quickly you move through it. It takes longer than you think and is more fun if you have someone helping you!
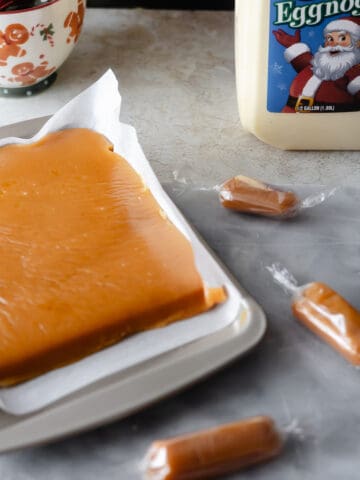
Caramel- ingredients
- evaporated milk
- heavy cream
- butter
- sugar
- salt
- corn syrup
- bakers chocolate
Caramel- equipment
- heavy duty thick bottomed pot, 8 quart minimum
- candy thermometer
- high heat spatula or wooden spoon
- 12" x 17" sheet pan
- parchment paper
Marshmallow - ingredients
- sugar
- corn syrup
- gelatin
- water
- vanilla
- cocoa powder
Marshmallow- equipment
- heavy duty thick bottomed pot, 8 quart minimum
- candy thermometer
- high heat spatula or wooden spoon
- 12" x 17" sheet pan full of chocolate caramel
- 5 quart planetary mixer
Dealing with Gelatin
Gelatin is my least favorite part about marshmallows. I've tested many different store brands and name brands, and my hands down favorite is the Great Value (Walmart) brand of unflavored gelatin. It is the most neutral, non smelly, truly unflavored gelatin around.
USE COLD WATER TO HYDRATE. Store bought instant gelatin needs cold water to hydrate, or "bloom", technically speaking. Measure your cold water exactly. You are adding syrup to this hydrated gelatin, so there will be no chance to cook more out. Too much water will change the texture of your marshmallow. It will be stickier and flow.
Melting over a hot water bath. This serves two purposes. It melts your hydrated gelatin so there are no clumps of it in your marshmallow. It also warms your bowl so your hot syrup doesn't seize on the sides.
- Measure water exactly, put it in your mixing bowl.
- Measure your gelatin out exactly in a separate bowl. Do not rely on the weight on those little packs, use your kitchen scale to weigh out the exact amount.
- Start whisking your water without adding anything. Yup, whisk that water.
- Sprinkle the gelatin in as you whisk. It will thicken.
- Set it aside while you do the rest of marshmallow cooking.
- When the marshmallow syrup is cooling, melt down your gelatin over a hot water bath.
Storage and shelf life for chocolate caramel marshmallows
After these are cut and wrapped into pieces, store them in an airtight container at normal room temperature. Do not store them in the refrigerator or freezer. Shelf life is approximately 3 months from a QUALITY standpoint, meaning the caramel will start to change texture. It will be 6-9 months before the flavor changes.My very top tips:
- Read the recipe entirely before beginning.
- Have a clean, large, workspace. Feeling trapped while you're cooking and looking for places to put things is one of the worst feelings.
- Prep the ingredients ahead of time by weighing them all out in containers, before you combine anything.
- Have the pan you are pouring caramel into or finished caramel pan ready and waiting. If you are pouring caramel into it, have it prepped with parchment paper. If you are layering with marshmallow, have the finished caramel waiting.
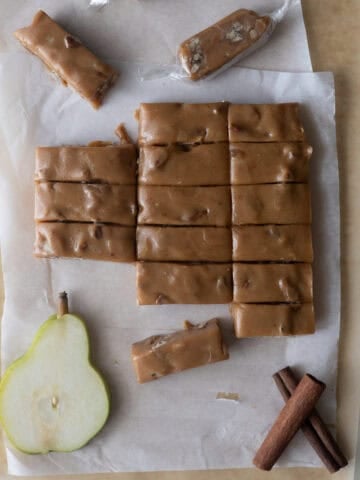
Love caramel marshmallows? So do I. Try out the original, viral One Sweet Mama caramel marshmallow recipe or even the caramel macchiato caramel marshmallows.
Double Chocolate Caramel Marshmallows
Equipment
- heavy duty thick bottomed pot 8 quart minimum
- high heat spatula or wooden spoon
Ingredients
Chocolate Caramel
- 680 grams white sugar
- 680 grams evaporated milk (2, 12 ounce cans)
- 175 grams heavy cream
- 2 grams salt
- 100 grams butter
- 570 grams corn syrup
- 226 grams unsweetened bakers chocolate
Chocolate Marshmallow
Gelatin Mix
- 30 grams unflavored gelatin
- 180 grams cold water
Syrup Slurry
- 380 grams Sugar
- 465 grams Corn Syrup
- 150 grams water
Flavors
- 90 grams cocoa
- 10 grams vanilla
Instructions
- Prep a 12 x 17" sheet pan by lining it with lightly oiled parchment paper.
Chocolate caramel
- Combine all caramel ingredients except for bittersweet baking chocolate in a thick bottomed, heavy duty pot. Stirring constantly, heat on medium heat until all ingredients have melted and dissolved. Bring to a boil over medium heat. You stir this whole time. Don't stop stirring until you pour out the caramel on the pan.
- Once boiling, increase heat to medium high. Cook until temperature reaches 243F. This is around 40 minutes, but watch you thermometer!
- Turn off heat. Add baking chocolate. Stir until caramel and chocolate are uniform.
- Pour on parchment paper. Cool for a minimum of four hours before making marshmallow.
Chocolate Marshmallows
Hydrate Gelatin
- Measure out 180 grams of cold water. Begin to whisk the water and add in 30 grams of unflavored gelatin while whisking. Set aside.
- Add sugar, corn syrup, and water in a heavy duty, thick bottomed pot.
- Stirring constantly, cook until syrup reaches 252F.
- Turn off heat. Pour syrup into a 5 quart planetary mixing bowl and allow it to cool undisturbed until mix reaches 212F.
- While syrup is cooling, heat gelatin over a hot water bath until fluid.
- Once syrup is 212F, add in gelatin. Using the wire whisk attachment, turn mixer to high. Mix for 8 minutes. Add in cocoa, mix for 30 more seconds.
- Spread marshmallow directly on top of chocolate caramel.
- Top marshmallow with a lightly oiled piece of parchment paper and allow it to set for a minimum of 12 hours before cutting.
- Cut into desired size. Wrap pieces in cello candy wrap or cut parchment.
- Store in an airtight container.

Did you make this recipe? Let me know!